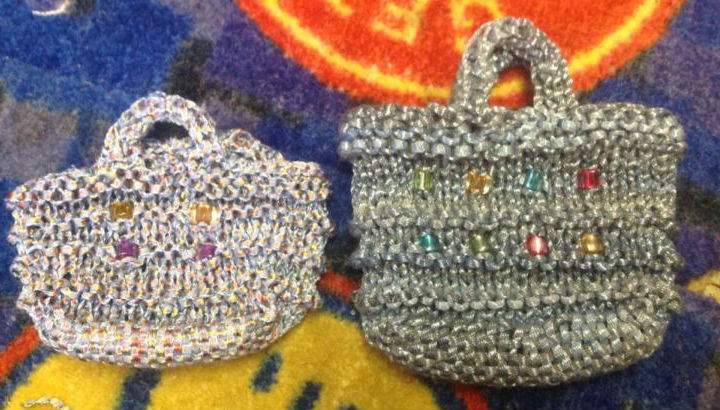
Woven Bottom Party Bag
By Ruth Airey © August 2015
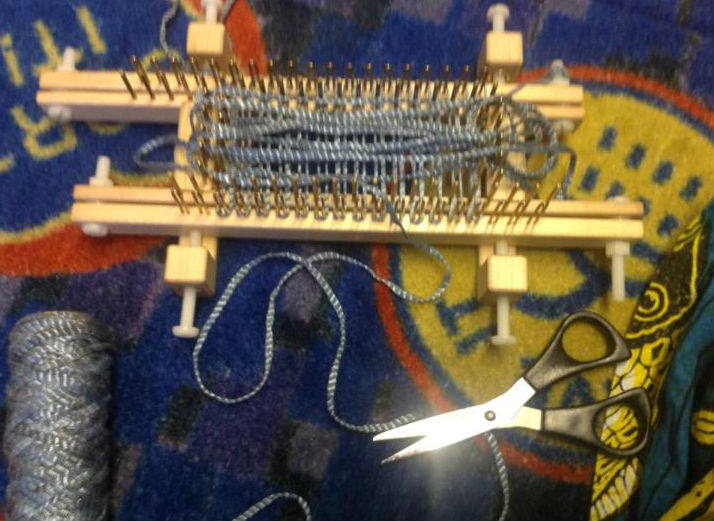
My aim was to create a small bag in one piece on the Kiss Loom without a seam.
Materials needed:
Ribbon yarn or a reasonably thick yarn that has some elasticity.
Kiss Loom small gauge or regular gauge loom can be used. I have used 14 stitches on each side and 5 on each end
Knitting tool
Flat bodkin or wool needle or plastic tapestry needle etc.
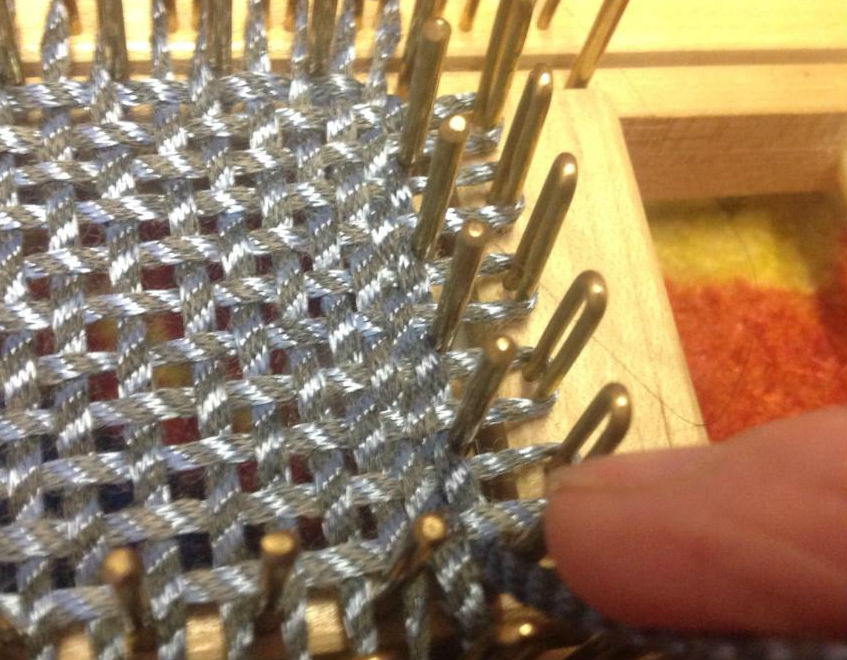
The bottom of this bag is different to normal as it is woven.
Techniques used...
1. Weaving on a kiss loom
2. Russian join
3. U-wrap and U-stitch
4. Purl
5. Bind off
6. Sewing in ends
7. Optional using beads in knitting.
Method
To start this fun item you need to cast on in a completely different way.
To start we are using a new technique on the kiss loom.
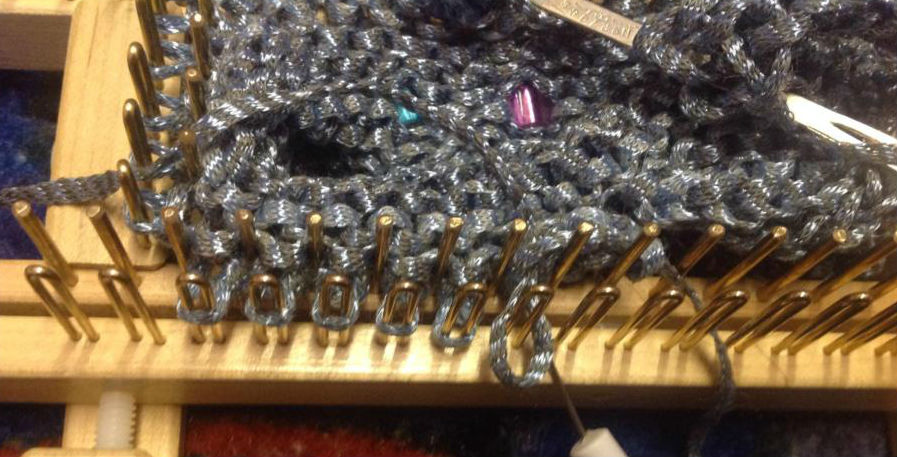
Starting at a back corner wind the working yarn round the nearest bolt to secure the end. Take the working yarn across the loom to the front and wrap the first peg U-wrap from left to right.
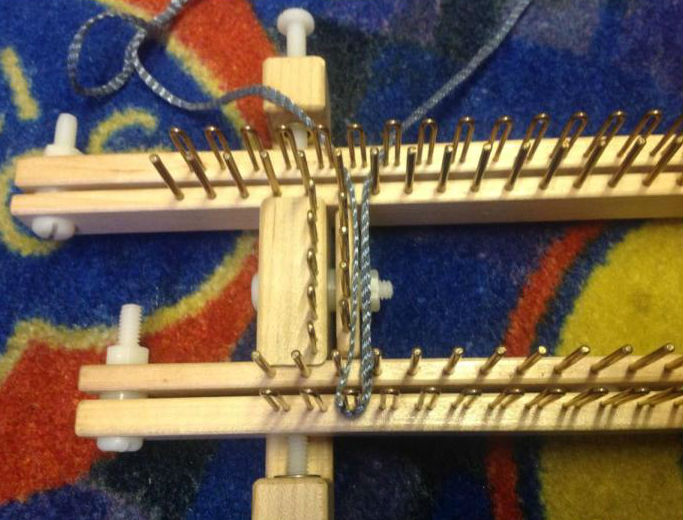
Bring the working yarn back across the loom and Uwrap the first peg at the back
Bring the working yarn forward across the loom and u wrap the second peg.
Bring it back across the loom and continue to wrap the loom in this way until you have wrapped all the side pegs finishing at the back. U wrap the last peg but not come to the front . This gives 28strands across the loom.
Wind the working yarn round the nearest bolt to secure it.
Note: Make sure you have the thread lying flat, if you have a flat thread. Also MAKE SURE it is fairly tight but not over tight so as to pull on the pegs!
Now you will need to allow yourself plenty of working yarn to be able to weave in the opposite direction. So we have 7 pegs on the ends therefore to calculate the yarn needed measure from end to end, multiply it by 14 and add another 12 inches to allow for take up. Measure your yarn from the bolt towards the ball of yarn and cut this length.
It will be long but don't worry about it, once you start weaving this will veyr quickly become more manageable. Thread the end through your chosen needle/bodkin.
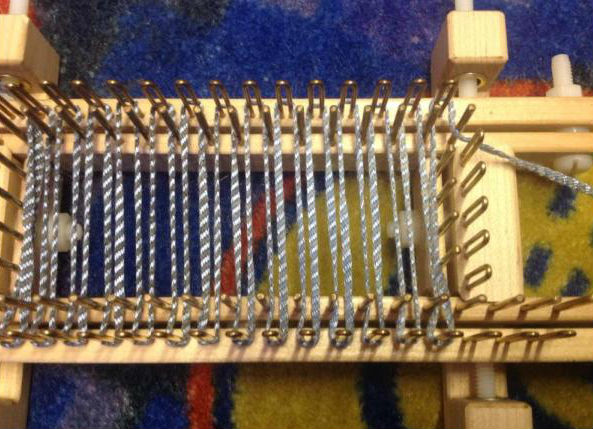
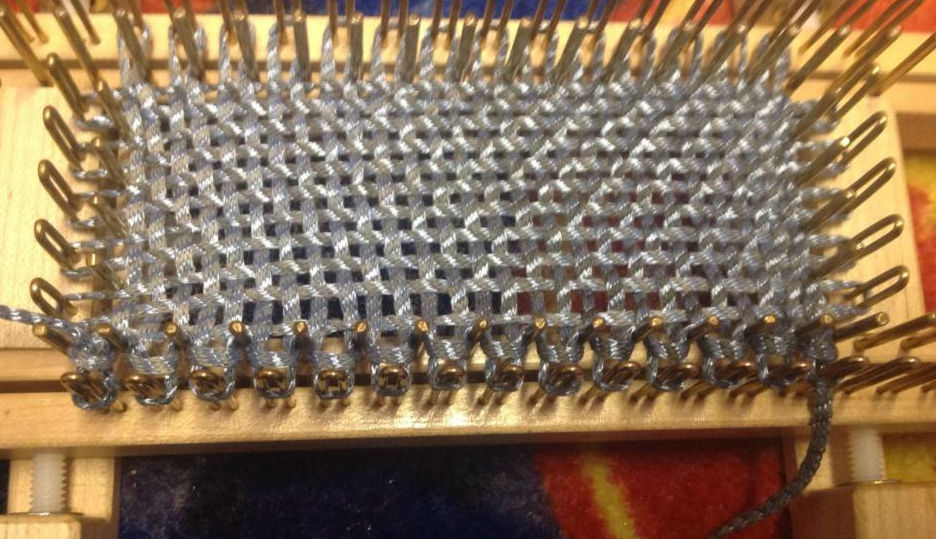
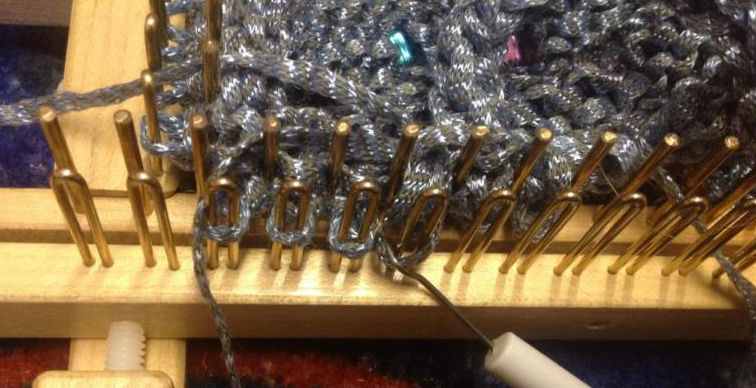
Unwind the thread from the bolt (you can do this now or you can do it once you have completed the first row) and carefully weave the needle under and over the threads going across until you reach the opposite end. Pull the yarn through tensioning it and making sure it lays flat and in between the pin and peg. It should be tight but not pulling on the pegs making it hard to weave.
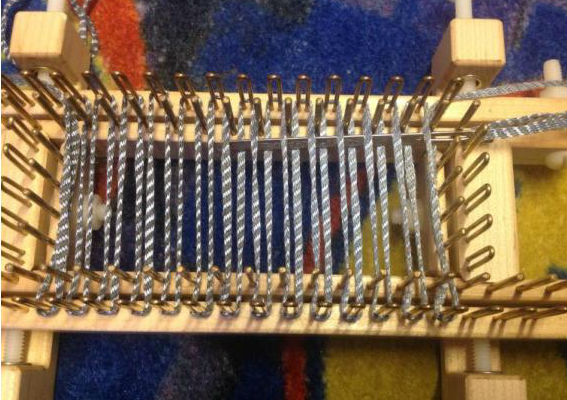
Making sure the yarn lays round the peg like a u-wrap take it back to the other end by weaving under and over the threads making sure to start with opposite to the last row.
For example if the working yarn went over the last thread then start by going under. If the last row finished with it coming under then start by going over.
Repeat this until you have completely woven your way completing all the pegs on the ends. You will find it gets harder to weave when you get near the end and IT WILL TIGHTEN. You will end up with the working yarn at the front right corner.
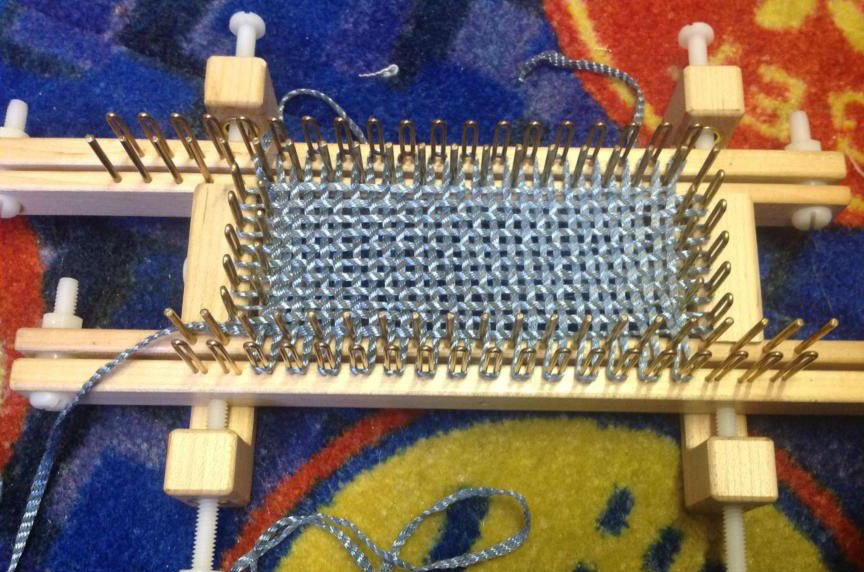
Now you have to get the yarn in a position to knit whilst maintaining the woven base.
This is done by weaving one last row in the opposite direction. So instead of weaving end to end this will be worked from the front to the back. You will end up where you started.
This is the bottom of your bag.
NOTE... Make sure you have NOT wound the yarn round the corner pins as this will prevent the bag moving down as you knit. If you have careful lift the loop off the pin taking care to keep the loops on the pegs.
TECHNIQUE SUGGESTION
Should your working yarn run out do not panic! Simply join another generous length with a Russian join. (If you don't know a Russian join Youtube is a great tool).
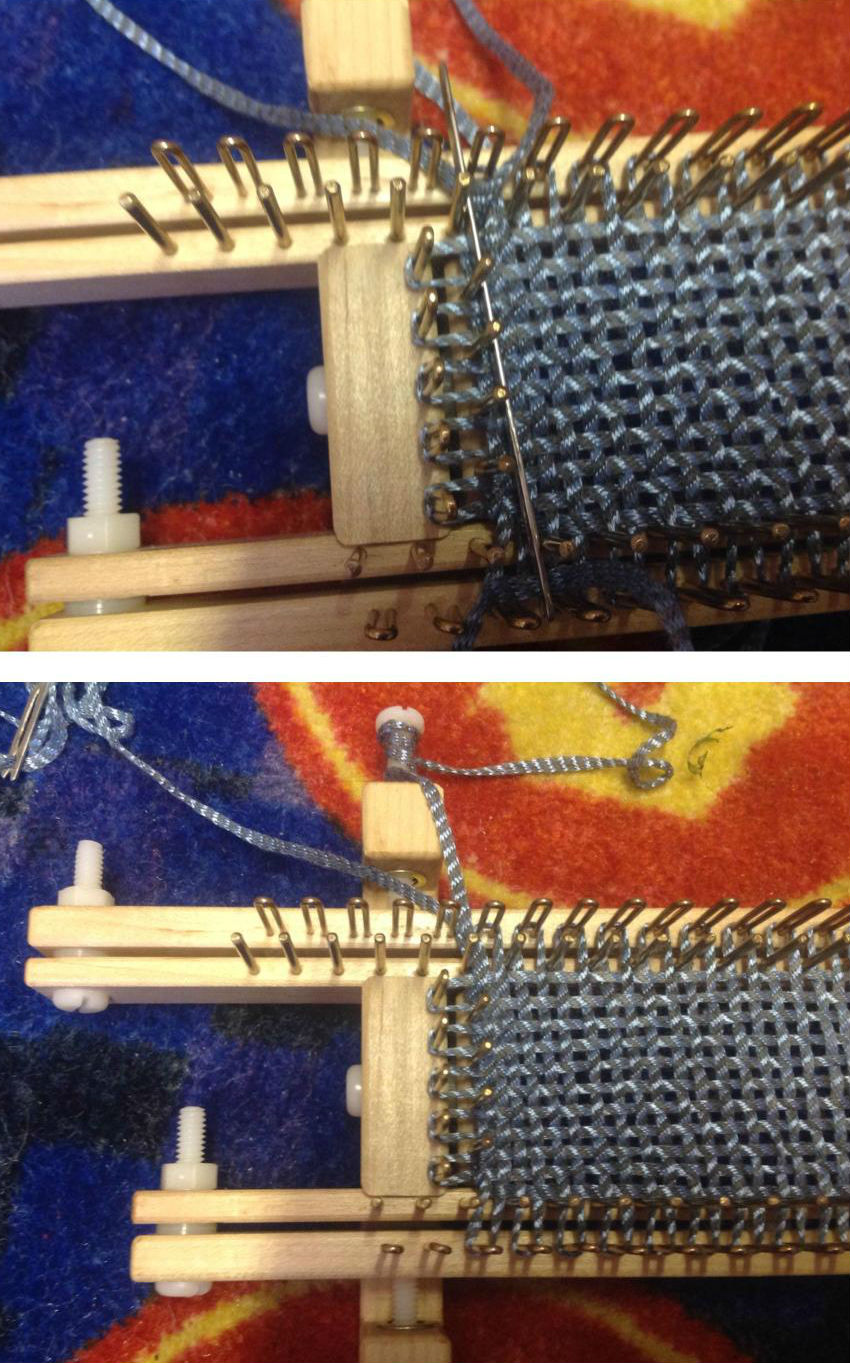
Your bag is now ready for the sides. You won't need to cast on because hey presto you already have some loops (stitches ) on the pegs.
You will need to join your working yarn back onto your ball. I used a Russian join for this (see above).
Once the yarn is rejoined then you can start to knit from the corner where you are using u wrap. I found it easy to turn the loom round so my yarn is at the bottom right.
My yarn has come over under the last yarn going from end to end. It naturally wants to work from right to left.
Be careful knitting the first row. DO NOT PULL THE THIRD OR FOURTH SIDE STITCHES OVER THE WORKING YARN JUST EASE THEM OVER CAREFULLY or you will pull the weaving out of shape!
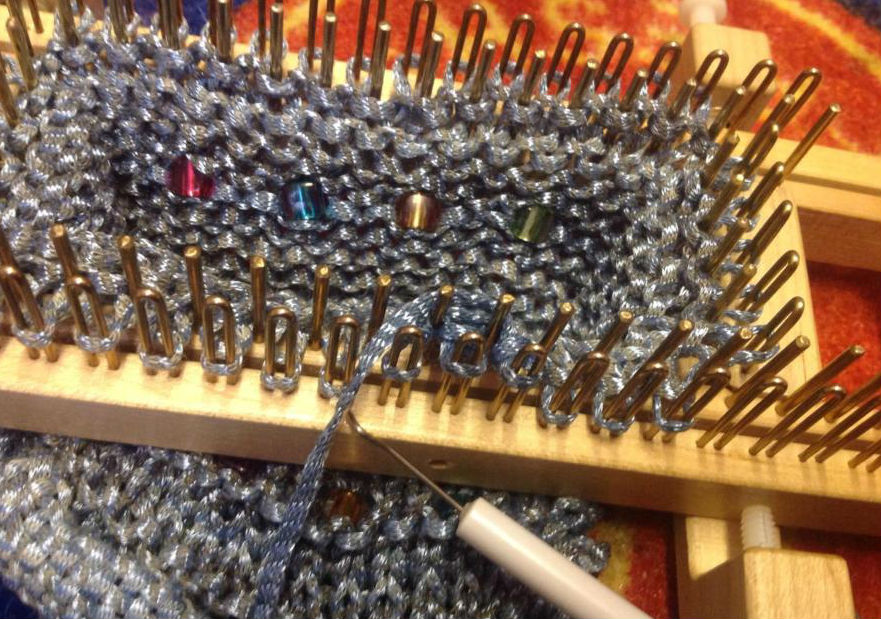
You can choose your preferred stitch to knit the sides.
Mine was..
3 rows knit
1 row purl
3 knit rows
1 row purl
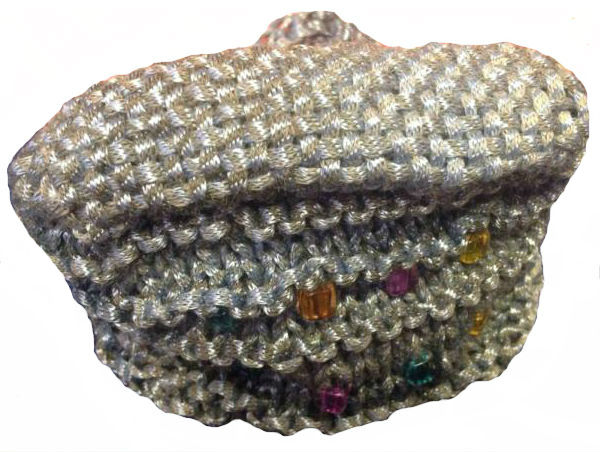
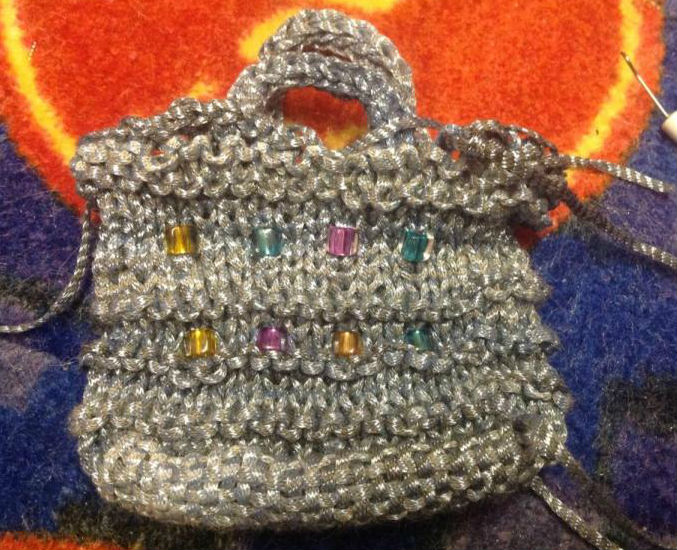
Until I reached the top. I also added some beads in on the long sides to create a pattern.
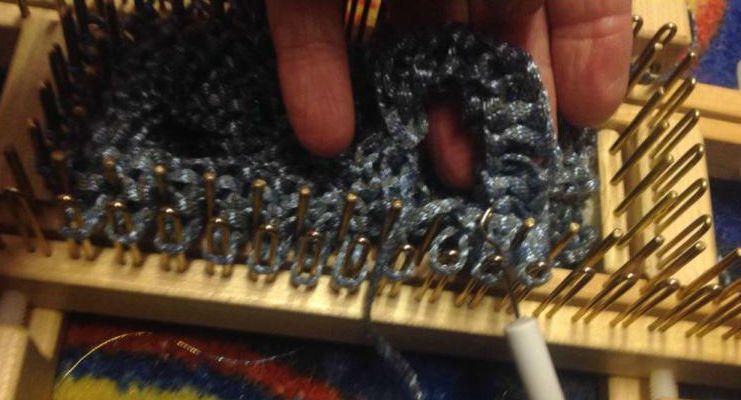
You can follow my pattern or make up your own. It is really up to you how you knit the sides. When you have reached the top of your bag (I did 18 rows) you will need to create handles.
To make the handles
Knit the first 3 stitches as normal.
Knit the next three stitches as an icord. (Example) knit three stitches take the working yarn round the back behind the pins back to the first peg of the 3 and knit in the same direction
again repeat this for 15 rows. If in doubt you can find directions to knit an icord on YouTube.
Leave these on the loom and cut the yarn leaving a long tail. Then rejoin the yarn on the next peg and bind off 2 stitches. The next 3 stitches are will be where you join the three stitches from the handle.
Take the three handle stitches off the loom onto the bodkin or a needle and place them onto the next three stitches making sure they don't twist.

Knit off these three one over one. Then bind them off them with the working yarn which was left at the first of these three pegs.
Carry on binding off until you reach the fourth peg on the other side of the loom.
Repeat the instructions for the first handle before finishing off the binding off. Sew in the ends and admire your bag.
These can be made in various sizes. Here is a smaller one.